Part 5: Mastering and Publishing
Mastering
Once mixed you’re almost ready to set your audio free from your editor and into the world. The final step is to make sure the exported audio file sounds the best it can, to avoid wasting all your hard, hard work. Here I use the term ‘mastering’ to essentially mean ‘make sure my final audio file isn’t so quiet it’s going to annoy people when they listen to it’.
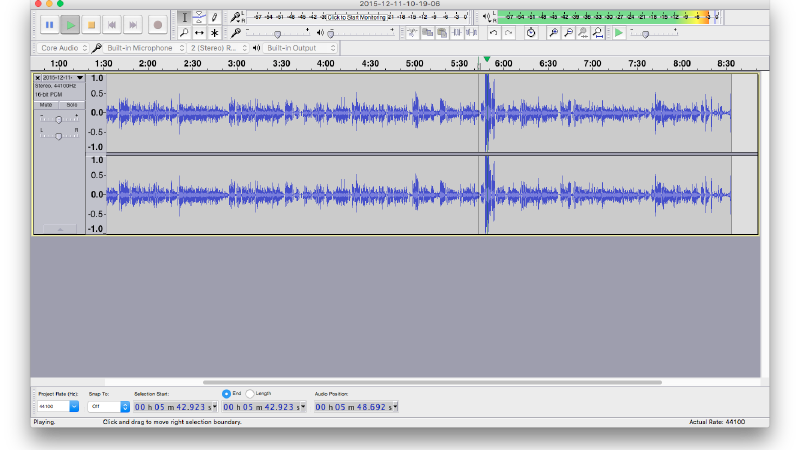
When you export and audio file from your editor, you normally get a stereo .wav or .aiff file that contains a left and a right track of the whole interview all mixed together (voice/music/sound effects, etc). If you then immediately open that file back up again in your editor and look at the waveform, you’ll see two things:
- How loud does the overall waveform relative to how loud it could be?
- Are there problem areas where the audio is maxed-out (clipping) or where one bit is significantly louder than the rest?
When I find issues, the easiest approach for me is to go back to the original file in my editor, make the appropriate envelope changes and re-export. This is slow, but it works.
A quick note on audio compression
What I’m describing above is effectively a form of manual audio compression. Compression typically means making quieter bits louder, without making the loud bits louder.
Applying compression to a recording of someone speaking will make the moments where they are quieter, louder. Perfect, right? Well sadly not, because as ’the quiet’ bit is also where all the recording noise and hiss lives - compression makes this louder too. This can result in a choppy disconcerting sound - so compression is a compromise, and at the end of the day, nothing beats good, clean, well-recorded audio.
One type of processing I do use fairly often is a brick wall limiter. Conceptually similar to a compressor, rather than making quiet bits louder, a limiter effectively does the job of making really loud bits quieter. Applied to the overall mix this can catch those loud peaks in the volume that are much louder than everything else. Used sparingly this is a great way to optimise your mix.
Finally I normalise my mix. Normalisation essentially means turning the overall volume for the entire mix, to maximise the volume that can be achieved when playing back the audio. Due to the noisy places in which podcasts are listened to (for example, via headphones and while travelling) and the limit to how much you can turn the volume up on your listening device, this step that can make a huge difference to the final listening experience. An in-depth discussion is beyond this article, but there are plenty of tutorials online.
Export audio
I export the audio as a .mp3 file (and keep a copy of the final .aiff or .wav too). There’s a good support page by Libsyn on what settings to use, although I tend to export in stereo and at slightly higher bit-rates because I’ve convinced myself it sounds better…
Set metadata
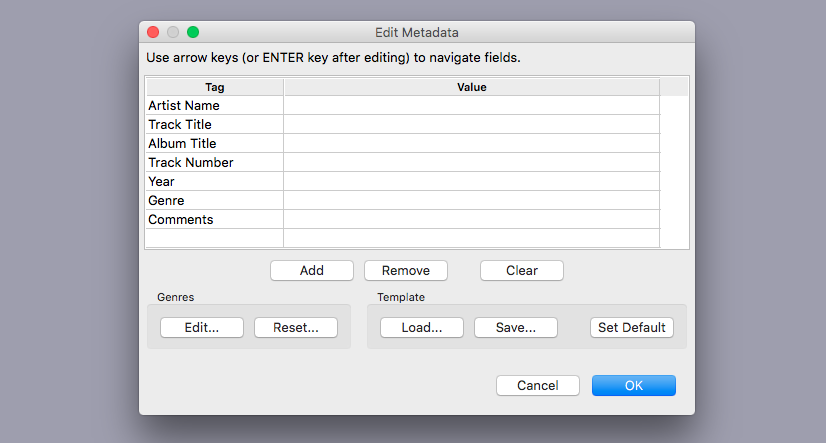
Metadata is data about data. In this case of mp3 files it means that as well as containing all the audio, the same file also contains some text about what the audio is, all packaged up together. Audacity will prompt you to enter metadata when you export to mp3. It’s also possible to embed your podcast artwork into the file, which I do using iTunes. Custom episode images aren’t really used by a lot of podcast players – so I don’t bother making artwork for each episode – but I do make sure to embed my podcast artwork (or in the case of CiW, the CiW artwork) into the file, to ensure a particular player has the image available to use if needed.
Distribution
With the episode finished, I listen back again to the final mp3 file one last time (with fingers crossed that I don’t have to change anything) and then publish it online. I then embed the audio into the blog post that accompanies each episode.
Marketing
'You’re doing something that no-one has done before…' - Dr Anna Lombardi https://t.co/vpPb1dY5Wr @CavendishIW @DeptofPhysics
— SciNotSci (@SciNotSci) April 27, 2016
At this point you will most likely just be glad to have finished the piece – however all that hard work might be wasted if people don’t know your piece exists. Make sure the it has an accompanying blog post with a description of the contents, and lots of nice professional looking photos to lure people in.
Promote links to your content on the social media platforms where your target audience are. Posts with photos get more clicks – some platforms such as Twitter allow you to embed audio clips (although only those hosted on Soundcloud) into posts – take advantage of all this. Email people about your content. Make some noise, people won’t find your content by itself.
For further reading I recommend the excellent Transom website, which has lots of articles and guides to radio production. Also the group Sound Women have an excellent podcast series featuring interviews with women working in radio, that is jam packed with advice and tips.
If you have any suggestions on how to improve this guide I can be contacted here.